We have so much going on at the house! So, just a quick update to show you a few of the changes around here.
Mud Room/Front Entry

We found an amazing carpenter who has made a few of my visions come true. I don't need to tell you that there are more then a few pictures of mud rooms on Pinterest that have made me drool. Tonight Chris, our carpenter, finished our mud room in the entry! I still need to install a few hooks under the cubes to finish it off. I love how the shoe rack underneath is hidden. I don't have a before picture, but it was basically a big open space.

I previously had a shoe rack/bench from Target in the front room, which has found a new home by the back door. In its place is this fun red chest from Ikea. (A huge thanks to my sister, who was visiting and put it together with minimal help from my husband the evening we brought it home.) I'm still debating what should go in it (and on top of it), but I'm loving it as quilt storage for now.
 |
| The Nook After |
The Nook
After my last post about "the nook" I was encouraged to remove the silver vase and insert more picture frames. (Thanks K.A.) I am so glad I listened. I think it is looking much more put together now.
 |
| The Nook (from House Tour) |
I'm including the picture I took from our house hunting trip because I remember thinking, "what in the world am I going to do with this!"
The Great Lighting Switch
I had a friend in town who used to work for Habitat for Humanity. I convinced her to help me (uh... my husband) switch around the lights in the house. Nothing went as planned, so we are just grateful that no one was electrocuted. I did however get new lights in a few places.
 |
| Kitchen Fan now in Blue Bedroom |
 |
| Blue Bedroom Before |
Anyway... the blue fan from the kitchen found its way up into the now blue "big boy" room upstairs. This is good for several reasons, one of which being we don't have central air and a fan on the bedroom level really helps things. We have done minimal work on this room, since H is still in his crib in the nursery, and will be there quite a bit longer. I have repainted the room. (See before picture from our house hunting trip.) My In-laws also repainted all the pockets in all the closet doors that had been painted in the house. I think i want to do roman blinds in this room but need to (a) figure out how and (b) find a good fabric.
 |
| New Family Room Light |
The lighting in the living room also got an update. This is the only spot for a ceiling fixture in the room, so I needed something that produced more light. Also, the other fixture was blue and there is already a lot of blue in this house. So... out came the blue fixture and in came the new, brighter, more neutral fixture.
Finally the kitchen (which had wires dangling for a few days while we waited for our order to come in) got a more modern, more kitchen appropriate light. I think this will mark the temporary end to changing out lights. I have two large lights in the front room that I want to replace with something more modern, but the husband has made it very clear he won't be doing that! So I either have to wait till he forgets or, when I can't take it anymore, I will hire someone! In the meantime I'm on the lookout for new fixtures ... a girl can dream.
The Weird Basement Room/Soon to be Office
 |
| Basement Room Before (Not our TV) |
 |
| Thursday's Progress |
When we purchased the house there was this small room in the very back of the basement that I had no idea what to do with. You can't tell from this picture, but the wood actually has these little carved leaves all around it and behind it was some sort of cloth wallpaper.
The redeeming factor was that this room has a great little window that looks out over the back yard...
perfect! When H is a little older, I would be able to sit in this room
while he plays in the yard.
Cue our amazing carpenter and a few pictures from Pinterest. I'm getting a built in desk, book shelves and WINDOW SEATS. I'm in love! Here is a little sneak peek of the work so far... although I'm told they are going to be done by the end of the week!
 |
| Friday's Progress |
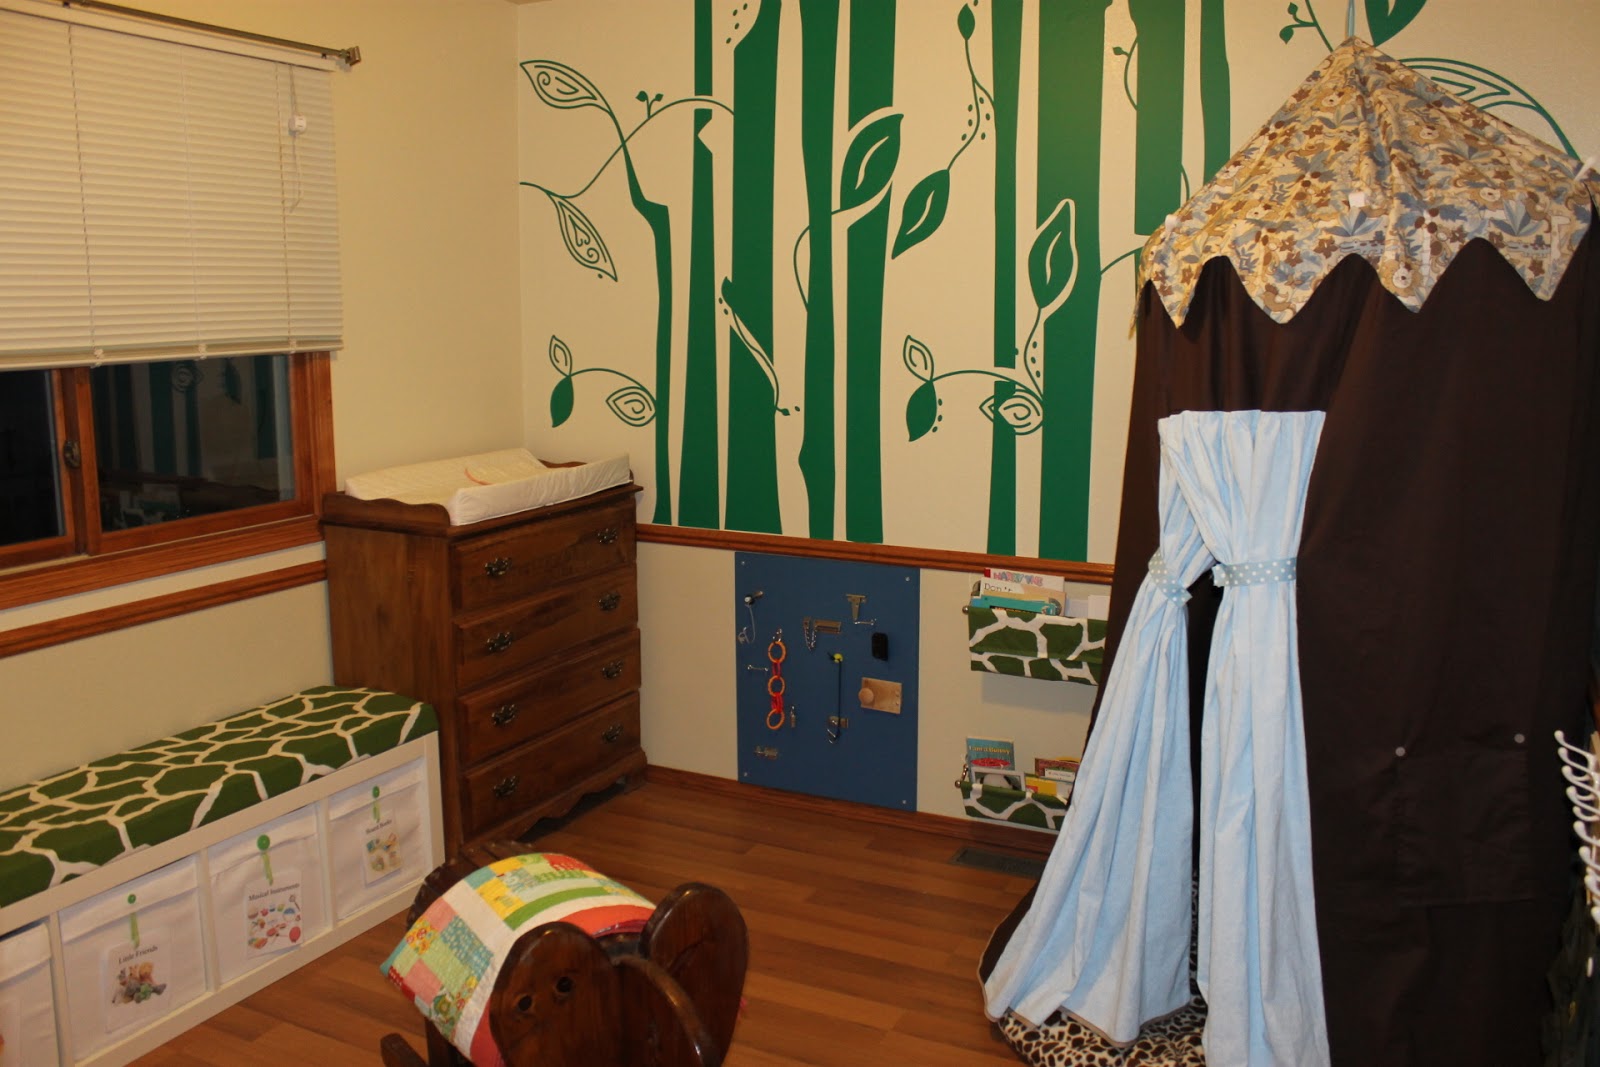
Upstairs Playroom
 |
| Ikea Lantern |
Lots of little changes in this room. The hardware board continues to grow with every Home Depot trip. Our new favorite activity, in addition to our old door bolt, is the level that has been attached to an eye hook. A small pulley system is also now on the side of the board.
 |
| Hardware Board |
An Ikea lantern and an old plant holder and a electric candle create a fun little lighting situation over the bookshelves.
 |
| Ikea Rug |
A new rug on the floor brings a forest floor to the playroom and a fun place to play with toys. (H hasn't really noticed yet, but a few older kids that have come over to play have been particularly taken with the animal tracks.)
 |
| Zebra Ikea Print |
Another great Ikea find is the zebra print for the large wall in the playroom. I saw this in someone's cart at the Ikea and was so in love, I hardly noticed that it would barely fit in my car with my other purchases. Thanks to my sister though, we made it fit.
 The Downstairs Playroom
 |
| Old Storage Area Understairs |
This used to be one of several basement storage areas, but it is soon to be another play area for little H. I don't have firm plans... but today I picked out paint colors and set my husband to work. The woman at the store said she wasn't sure why anyone would want to purchase the colors "fire" and "squash" ... the jury is still out, but with no windows I was hoping for something warm and bright. It's certainly bright... it's wet in the picture and mellows out quite a bit. You will have to stop by again to see the finished project.
Also in my garage are a variety of objects that got several coats of paint today....but you'll have to wait to find out what I have in store for them.
Happy Crafting!

 We decided to cut down our own tree from the National Forest this year. It seemed like a very "Colorado" thing to do. With our $10 permit in hand and good friends at our side, we headed into the forest to find the perfect tree.